Take a look at “PART NO” on the label at the bottom of your time recorder. For TR4030xx-10, TR4030xx-20, TR4050-10 or TR4050-20, follow the steps as below.
- Connect TR4030/TR4050 with Hub via WAS-1499 cable.
- Power on TR4030/TR4050.
- Disable the firewall and antivirus program in your computer!
- Open the software DS Manager (Start\Programs\Tibbo Terminal Server Toolkit\Tibbo DS Manager). Find your TR4030/TR4050 on the “Auto-Discovery” list. (Default IP address of TR4030/TR4050 is “1.0.0.1”.)
- Click your TR4030/TR4050 on the list and click [Change IP].
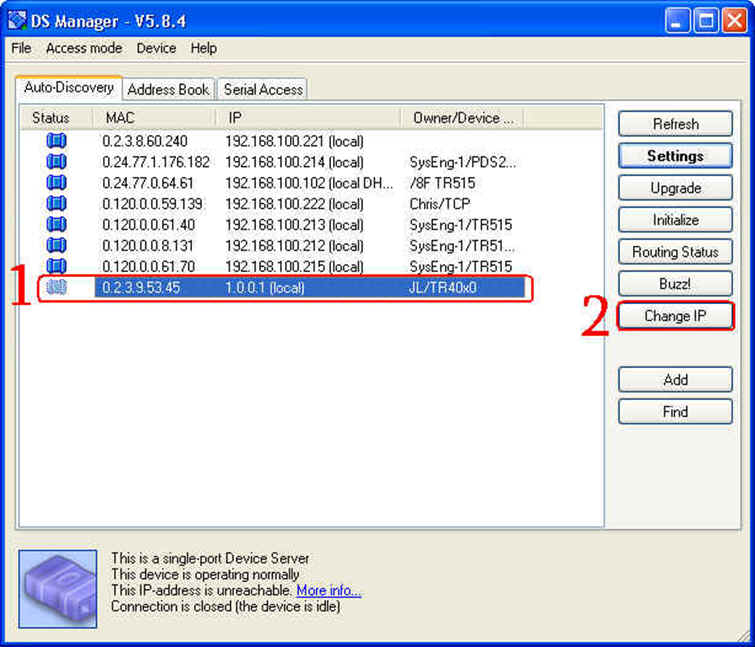
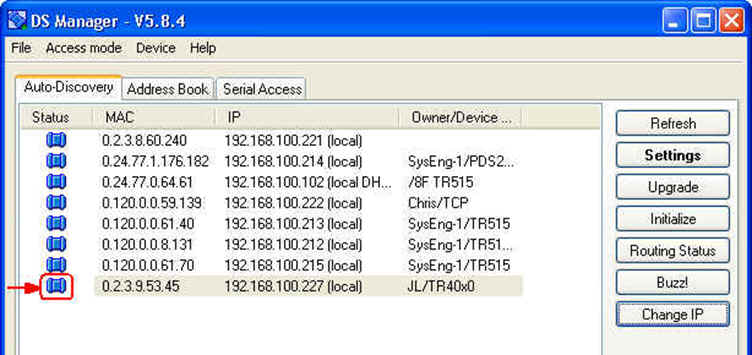
- Enter an available IP address and then click [OK]. Once IP address is changed successfully, the status icon of your TR4030/TR4050 on DS Manager’s list will become blue.
For TR4030xx-00, follow the steps as below.
- Present (Swipe) Master Card to TR4030 to enter the menu of programming mode.
- Select [Setup]->[Advanced...]->[Ethernet]->[IP address].
- Enter an available IP address with the keypad. (If you want to erase the IP address you just entered, press F3 key.)
- Press F4 key to confirm.
- Press F1 key to exit.
Note: "xx" indicates different reader type and disk port type.
Comments